Showing posts with label Dollar Store Crafts. Show all posts

Monday, December 2, 2013

Christmas Crafts: Last Minute Advent Calendars

I just realized I have never posted any Christmas crafts on my blog.  We do crafts every year, and every year we make advent calendars to help the kids count down to the big day.  This year I wanted to do something different  crafty for the blog, oops I meant kids. So I decided to make a  3D calendar using materials only from around the house and the dollar store.  You can make this tonight!
Here's what you need:
  • 1 package of small disposable cups (plastic, paper or Styrofoam) or if you have them empty toilet paper or paper towel rolls cut into 2" or 3" pieces.
  • paperboard or foam board or just cut up a cardboard box
  • thick yarn, string or ribbon 
  • hole punch
  • hot glue gun
  • lots of glue sticks
  • paper plate
  • pencil 
  • Sharpie marker
  • good scissors and/or box cutter
  • white school glue
  • printer and ink
  • printable numbers (I used these, but you can google "printable advent calendars" and find some you like).
  • construction paper or old Christmas paper
  • tissue paper (the kind you stuff in gift bags)
  • 25 small trinkets ( I used candy, stickers, ornaments and small toys) that will fit in your cups
First things first, decided what shape to lay your cups (or tp rolls) out in. Make sure your piece of paperboard or foam board is big enough.  (If you are using cardboard box, fold it down flat and cut it apart, so it lays flat.) Cut tissue into squares large enough to cover the mouth of your cups.  Mine were approximately 3" x 3".  Pour glue on paper plate.  Dip rim of cup in glue lightly. Put in a trinket. Put one sheet of a tissue square so it covers the opening.  Repeat for all cups, set aside to dry. Cut shape of choice using super strong scissors or box cutter.  Cover shape in construction paper or gift wrap gluing it down as you go. If you want to hang your calendar, punch holes now and add ribbon to hang. Rearrange your cups or tp rolls, then start gluing them in place. (After much trial and error, hot glue gun was the best method for this craft).  Let cool, remove excess glue strings and add numbers to your cups using glue stick to attach ( or you could just a Sharpie Marker).  I chose to mix them up, but you can put them in order as well.  

All Done!
My interpretation of a candy cane

My imitation Christmas tree

Wednesday, November 27, 2013

Turkey Day Crafts AKA Cheap Thanksgiving Decorations and Stuff

This year I decided that I did not have enough decor to celebrate the cornucopia of goodness that is known as Thanksgiving. Instead of going out and buying more I decided to be crafty and make my own.  Or use free child labor and let the kids have craft time.  These are all super fast crafts perfect for procrastinators!

For paper Pilgrim Hats:
We used three pieces of black construction paper 9x12" and one piece of yellow for to make two hats.
Fold paper in half (width wise), careful not to make a sharp crease.  Then free hand cut a kinda Pilgrim shaped hat, then use yellow to cut out a buckle shape.  Glue to front of the hat.  With remaining black paper cut into 4 strips length wise.  Staple one strip to back side of hat, on either side.  Fit to your kid's head and staple to size, trimming excess. There you go! Instant Pilgrim!

Sonshine insisted on doing "serious" Pilgrim poses.

Paper Bag Owl Puppet -Print out pattern and have the kids color it.  Then glue on brown paper bags. There you go, festive Fall owls!

Thanksgiving Bingo  - I found this super cute free printable bingo card game.  I printed it out on card stock so it could be reused and to make it educational, we play Bingo only in Spanish.  That what the kids are exposed to a different language and I get to practice my rusty Spanish! Win-Win!

Paper Bag Pumpkins-  Stuff paper lunch bags2/3's full with old newspaper, use green pipe cleaners to close, then paint green and orange. Let dry and viola! you have paper pumpkins.

Paper Bag Scarecrows-  Using the paper bag as a base cut out various shapes with different color construction paper to make clothes.  Use googly eyes, and buttons to make it look a little more fancy.
Teenie's Turkey garland (she made this using a turkey craft she got from the library. We punched holes in the foam leaves and threaded to make a garland.)


Wishing you a Happy Turkey Day filled with family, fun, love, and (crossing fingers) a juicy turkey!


Tuesday, May 7, 2013

Tutorial: 99 Cent Store Bikini Makeover # 1

Nothing beats crafting, unless you are crafting on the cheap!  I found a couple of bikinis (yes, bikinis!) at the 99 Store during one of my shopping trips.  The wheels in my head started turning before I could even start rummaging through the rack to find my size.   Lace trimmed bikinis are super popular right now, but I have been having a hard time trying to find one in my size the local stores, so I decided to make my own.
I paid a buck for each piece, and the lace was in my craft bin, I bought it at WalMart years ago and had forgotten about it. It was $1 for 3 yards and came in a little plastic bubble. You will also need pins and thread in a color that matches the lace as closely as possible.  ( A contrast color would look great as well but the thread color will hide any mistakes you make.)
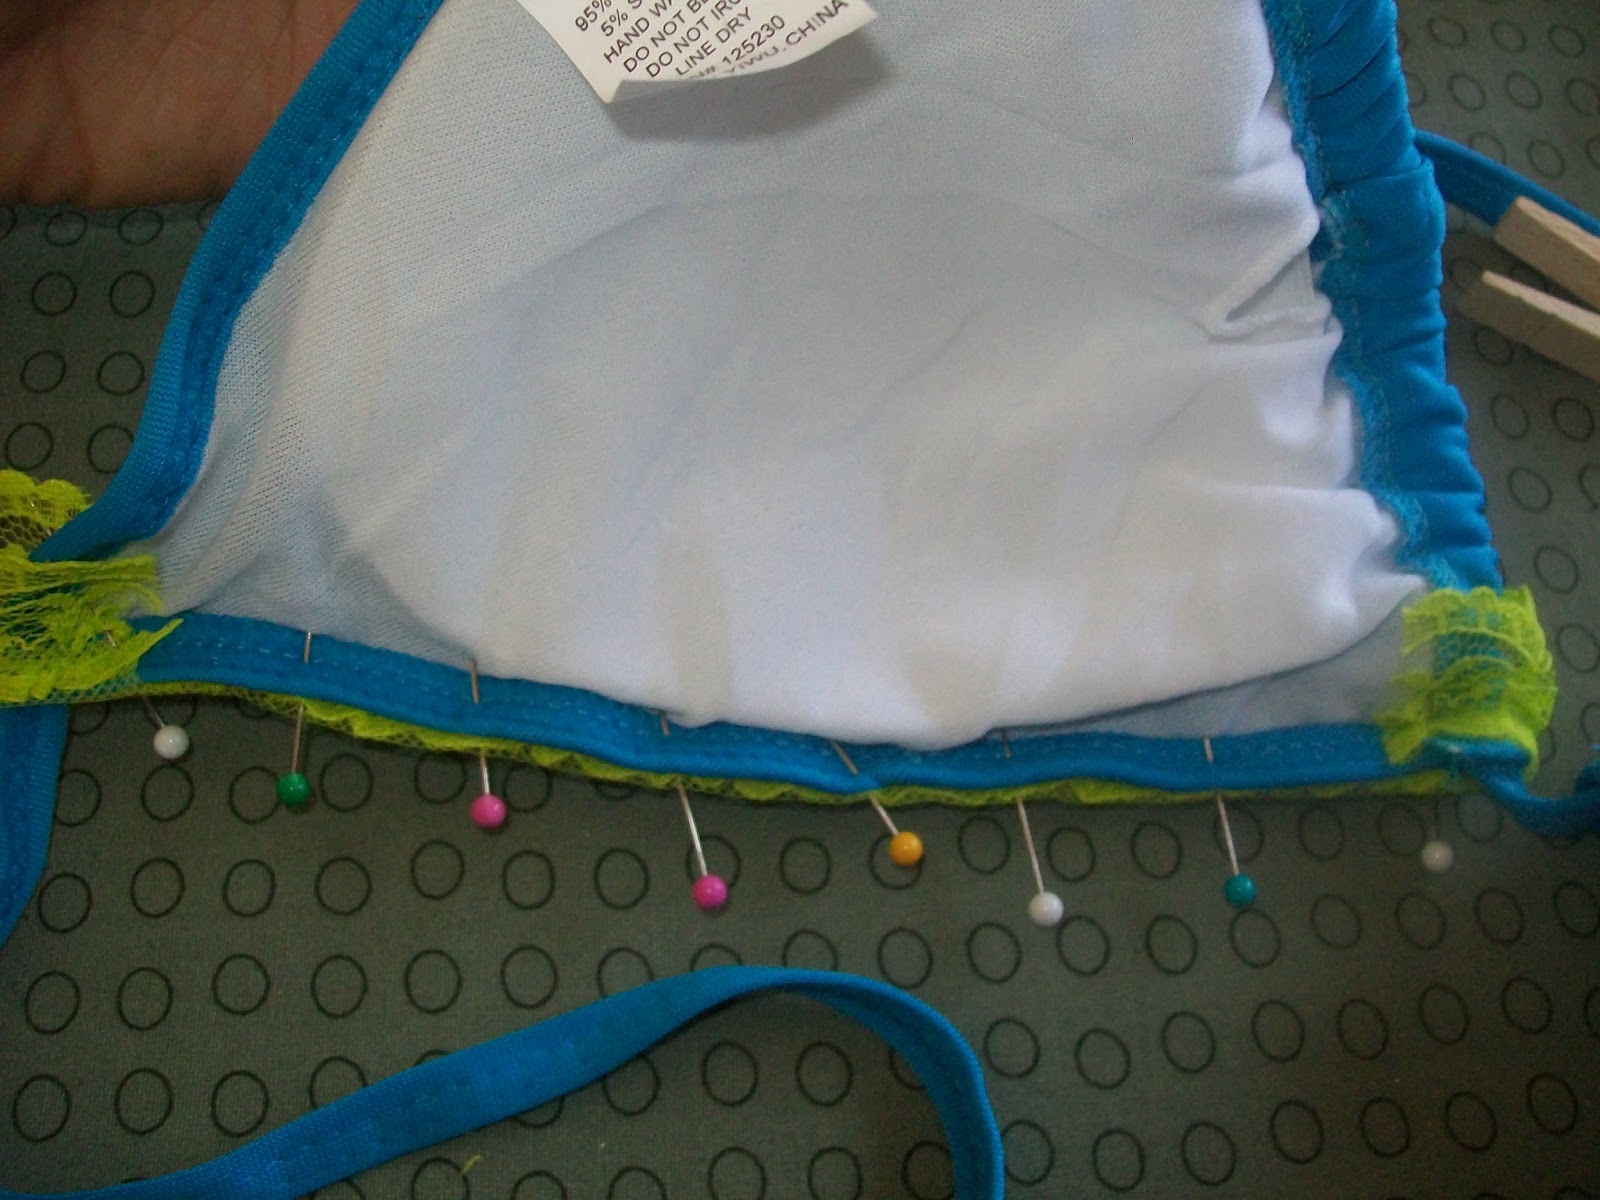
 Arrange lace any way you like it, using a lot of pins to hold it in place.
 Since my lace was pre-ruffled I decided to just use it as a trim.   I pinned it along the top center.  Here is where it gets a little complicated, if you are going to bring the trim over the bottom tie string, remember that you will be sewing it in place so you won't be able you to adjust the cups. Make sure you try on the suit and have the cups in the spot you want.
 I set that aside and started on the back of the bottoms. I pinned lace to the top edge right along the trim.
 I measured down 3 inches from the top and marked with chalk, I did this on both sides.
 Then I added another row of lace.
 Then I measured the distance between and added a row of lace at 1.5"
 I turned it over and laid it out and thought it still needed a little something so I added a row of lace in the front.  At this point your suit should be full of pins and if you like the design laid out, go ahead and sew.  If not, now is the time to tweak it a little.
 Now you are going to tack the lace in place.  Set your machine on a long straight stitch.  Although it is not recommended, I always sew over the pins, I know I'm horrible but the worst thing that will happen is that you will break a needle and bend a pin.  I have a bunch of needles so what do I care?  Sew slow, you'll be alright.  Then after you tack, set your machine to a zig zag stitch, this allows for some stretch, in the tread,( the last thing you want to do is start busting out at the seams at the pool) and sew over lace again. Do it twice if you are paranoid or are using cheap thread. 
 There's the front of the bottoms.
 Then flip over and start on the back. Do it the same as you did the front, tack first, remove pins, and sew on a zig zag stitch.
 Last but not least you are going to do the top. Make sure that you remove the pads or insert thingies that are in the top first if this applies to your suit, if not don't worry about it.  

 All done! Top and front.
 Top and back.

Sorry about the pics, I don't have a dress form yet, and there is no way in hell that I am posting pictures of myself in a bikini on the interwebs.


Tuesday, April 30, 2013

Tutorial: 99 Cent Store T-shirt + 1/2 yard of fabric = Dress

The other day, on one of my very frequent trips to the 99 cents store, I spied a bin full of clothing there.  Not being one to turn down a deal, I thought I'd stop and take a look and found a bunch of t-shirts.  One them was the one I used for this craft, a black fitted tee, size small.  I went home and rummaged through my fabric stash to see what kind of craftiness I could apply to this poor, boring shirt. 
I found half a yard of Hello Kitty fabric, that would be perfect.
That being settled, the first thing I did was turn the shirt inside out and cut the sleeves off following the seams.

Then I cut off the top back part of the shirt, starting at the shoulder seams, then across the back. Then I turned it down about 1/2 inch and pressed it in place. You can adjust this to make it lower or higher, I didn't want the back too low since I was making it for Teenie.
I set the shirt aside and started on the fabric.  Using the shirt hem as a guideline I stretched it as far as I could and lined the fabric up with it.  Then I cut off the excess fabric. Set aside extra fabric, for use later. If you have no extra fabric, skip this step.   I cut the entire 1/2 yard in half long ways and pinned up 1/4 inch for a hem, pinned and pressed in place.
Stitch in place using a finishing stitch.  If you ave a fancy, computerized sewing machine, just pick one of those wide stitches.  If you have a regular sewing machine, just use a zigzag stitch.
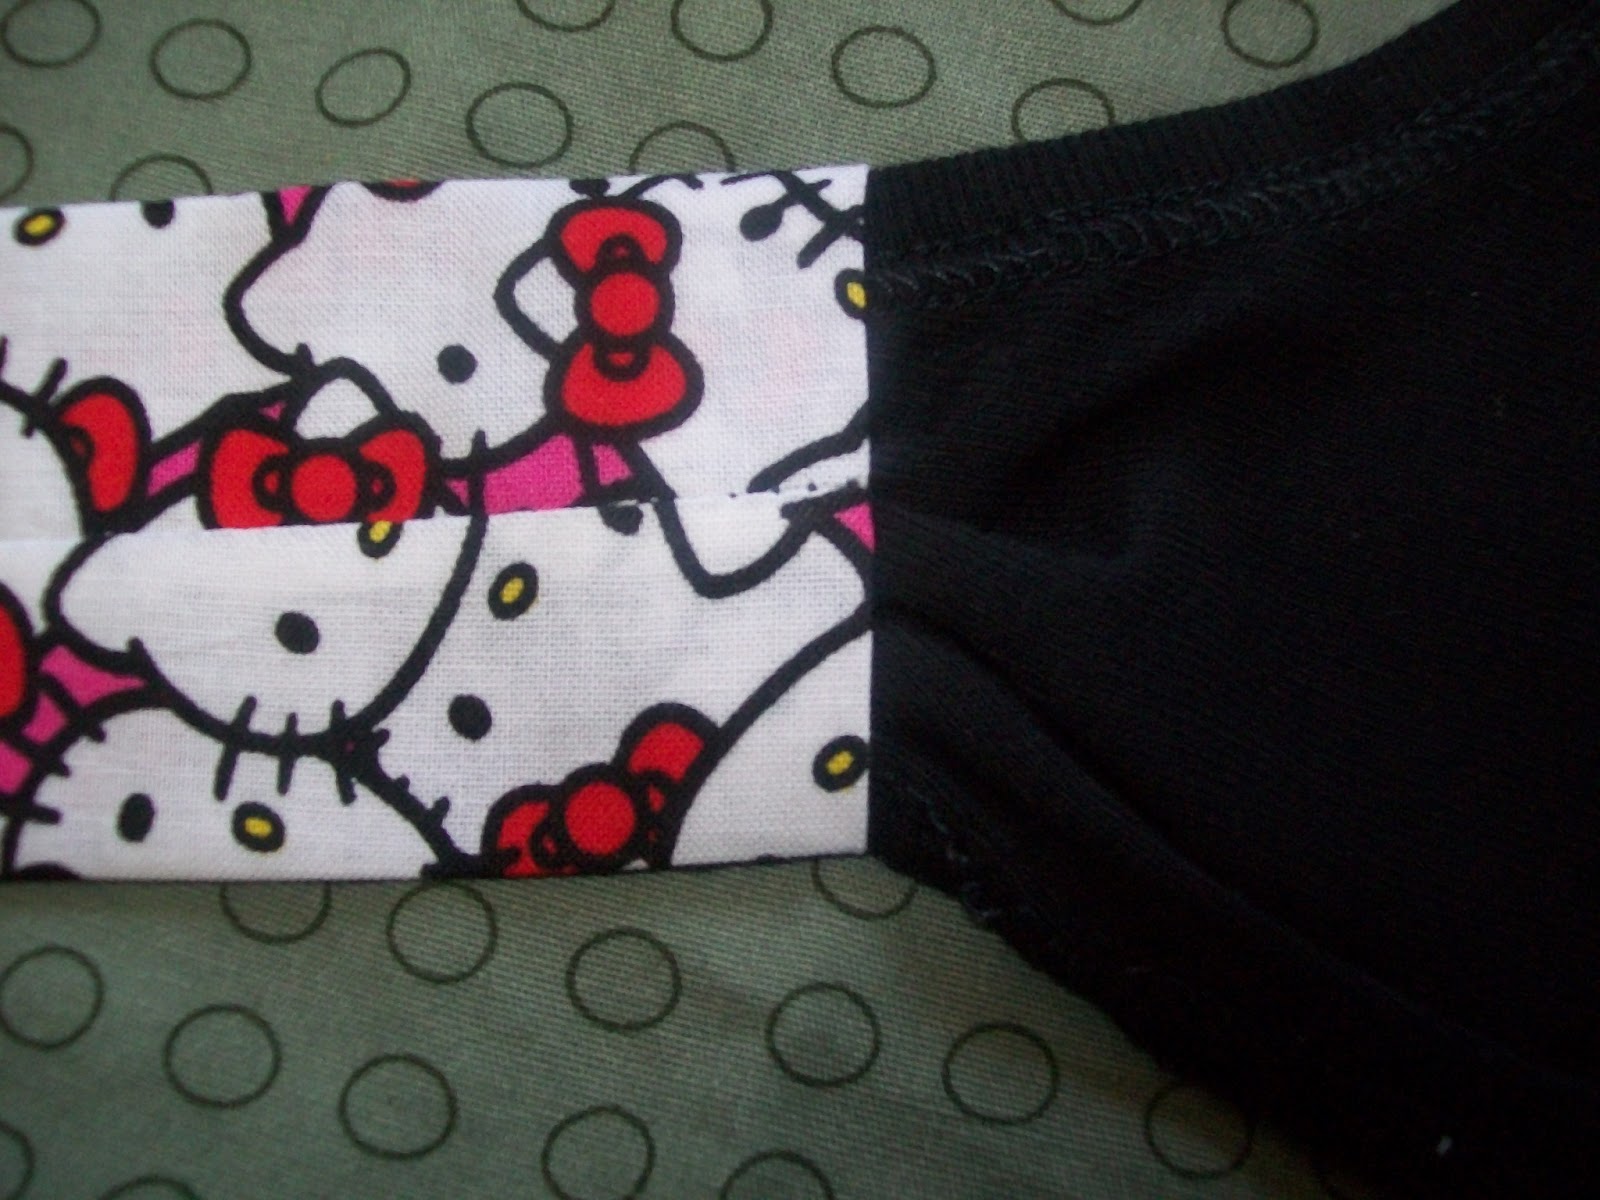
You want the edge to look like this. 
 Then match together sides and sew together so you are left with a big loop.

On the opposite end of the hem, use straight stitch and make the stitches as long as your machine will allow.  Then pull the bottom thread so that the fabric starts to gather.
Pin shirt hem to gathered edge of fabric. You want to make sure you are pinning them both right side out. This is important because you are actually going to use the shirt hem to sew as a guide line. If you need to, pin shirt and skirt together inside out first, then flip right side out and re pin. Make sure you take all of the pins out of the underside.  Then sew, using the hem as a guide line. I actually stitched right on top of the bottom hem of the shirt using black thread. Stitch slowly on the line careful to avoid pins.
Ta Da! It almost looks like something.  But it isn't anything yet, because it desperately needs straps to be functional.
 On the edges of the shirt that used to be armholes, I used a finishing stitch to run along the edge of the shirt. I just chose a stitch that looked as close to the manufacturer's stitch as possible.  Or you could just use a zigzag stitch and run along the edge of the armhole, sewing over the folded hem, and a little past it.  Do this on both sides.
Turn and stitch across back folded down hem. I feel that it is better to use the same color or as close to possible as the fabric you are sewing, because it hides mistakes, which is very helpful if you have been drinking and sewing.  After the back hem is stitched feel free to cut excess material if desired.  At this point you are pretty much done, all you need is straps.

This is the excess fabric I had left over from the skirt, I actually ended up with 2 pieces this size.  If you do not have any feel free to use what ever excess shirt material you may have, or scrap that idea and use ribbon or contrasting fabric.
Cut in half lengthwise.  Then fold each strap together lengthwise again, so they are inside out.
Stitch along the edge leaving ends open. 
Turn right side out, center the seams and press.
 Tuck in ends.
 Tuck top part of sleeves in as neatly as possible.  Make sure the seam will be facing on the inside of the top. Pin in place, then sew.

 Here's what the straps look like.  At this point you will want to try your dress on your model to figure out where the straps will sit and to figure out if any other alterations need to be made.
 I had Teenie put on the dress and then pinned the straps in place with safety pins (because little kids really, really hate it when you poke them with straight pins.)
Sew in place, as you can see my stitches got a little wonky. This is what happened when you drink and sew.  But it's on the inside and no one can see it unless they look for it.  Any hoo, I decided the dress looked a little plain and needed some pizazz. Since I'm running low on rhinestones and glitter, (Teenie thinks everything looks better with bling and glitter, and I totally agree) so I made a bow.
 Using the last of my Hello Kitty fabric, I cut two rectangles, turned them inside out and sewed them together on all four sides.
 Pull apart in the center making a little pillow.
 Snip a little hole in the center of one side, then turn the fabric right side out.
 Pinch together using a little accordion fold.
 Use fabric to hold center of bow. I wanted contrast so I used a piece of the t-shirt.
 Pin and hand stitch straight through the bow and the center piece of fabric.

Either attach with a safety pin, sewing the safety pin into the fabric. Or hand stitch the bow on your dress. I decided to hand sew it.

Yay! All Done!
Time for a photo shoot!